前回 はiPhoneで鉄道模型を運転するためにDCCソフトをインストールしました。今回はその初期設定を行います。
すべての接続を完了 した後、パソコン上の JMRI Decorder Pro3 を実行します。

Decorder Pro3のメニューバーからEdit→Preferencesとたどると、Preferences画面が表示されます。
ここからWiThrottleを選択し、上記の画面のように設定します。ただ、初期状態が上記の画面と同じはずなので、設定を変更する必要はないはず。

その後、Decorder Pro3のメニューバーから、Actions→Start WiThrottle Serverをクリックします。

WiThrottle Server画面が表示されます。
この後iPhoneのDCCソフトWiThrottle Liteを実行します。
初期設定であれば、自動接続になっているはずなので、上記のように画面下部に「Throttle」、「Adress」、「Settings」が表示された画面が出てきます。

うまく接続できないときは上記の様な画面が表示されるので、「Use No Server」を選択して「Okay」をタッチします。

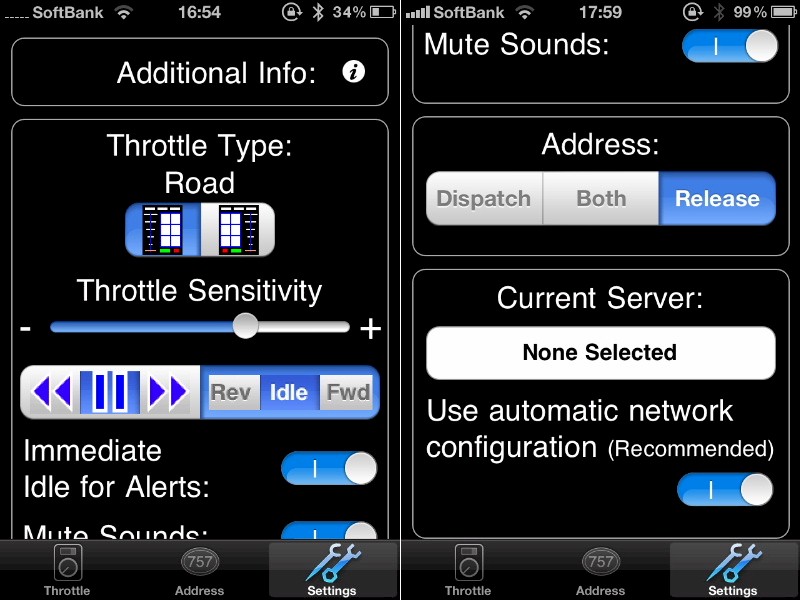
「Settings」を選択した後、画面を下スクロールし、Use automatic network configurationをON(|)にします。

すると、Current Server名にJMRIをインストールしたパソコン名が表示されます。

同時にWiThrottle Server画面に接続されたiPhone画面が表示されます。
それでも接続できない場合は下記のように手動設定を実行します。

パソコン上のWiThrottle Server画面にはIPアドレスについて上記のように表示されています。

iPhone WiThrottleのSettingsに戻りUse automatic network configurationをOFF(○)にします。

None Selectedをタッチすると上記の画面が表示されるので、WiThrottle Server画面に表示されているIPアドレス(通常192.168で始まる)とポートNoを入力し、
Setをタッチします 。
以上で接続できるはずで、後は「Throttle」、「Adress」を操作することでiPhoneで鉄道模型を運転することが出来ます。
その基本操作はこちら
Posted Date:16/Oct/2012
